Time and again I have heard the same complaint from parents: my kids dump everything on the floor and it’s always a big mess.
Well, sorry parents, I can’t actually help with that, but what I can do, is help you hide it!
I built two simple doors to cover the clutter that is toy storage. Occasionally, I do dump the baskets and cubes out and organize them, but for the most part cleaning is shoving things into said baskets.
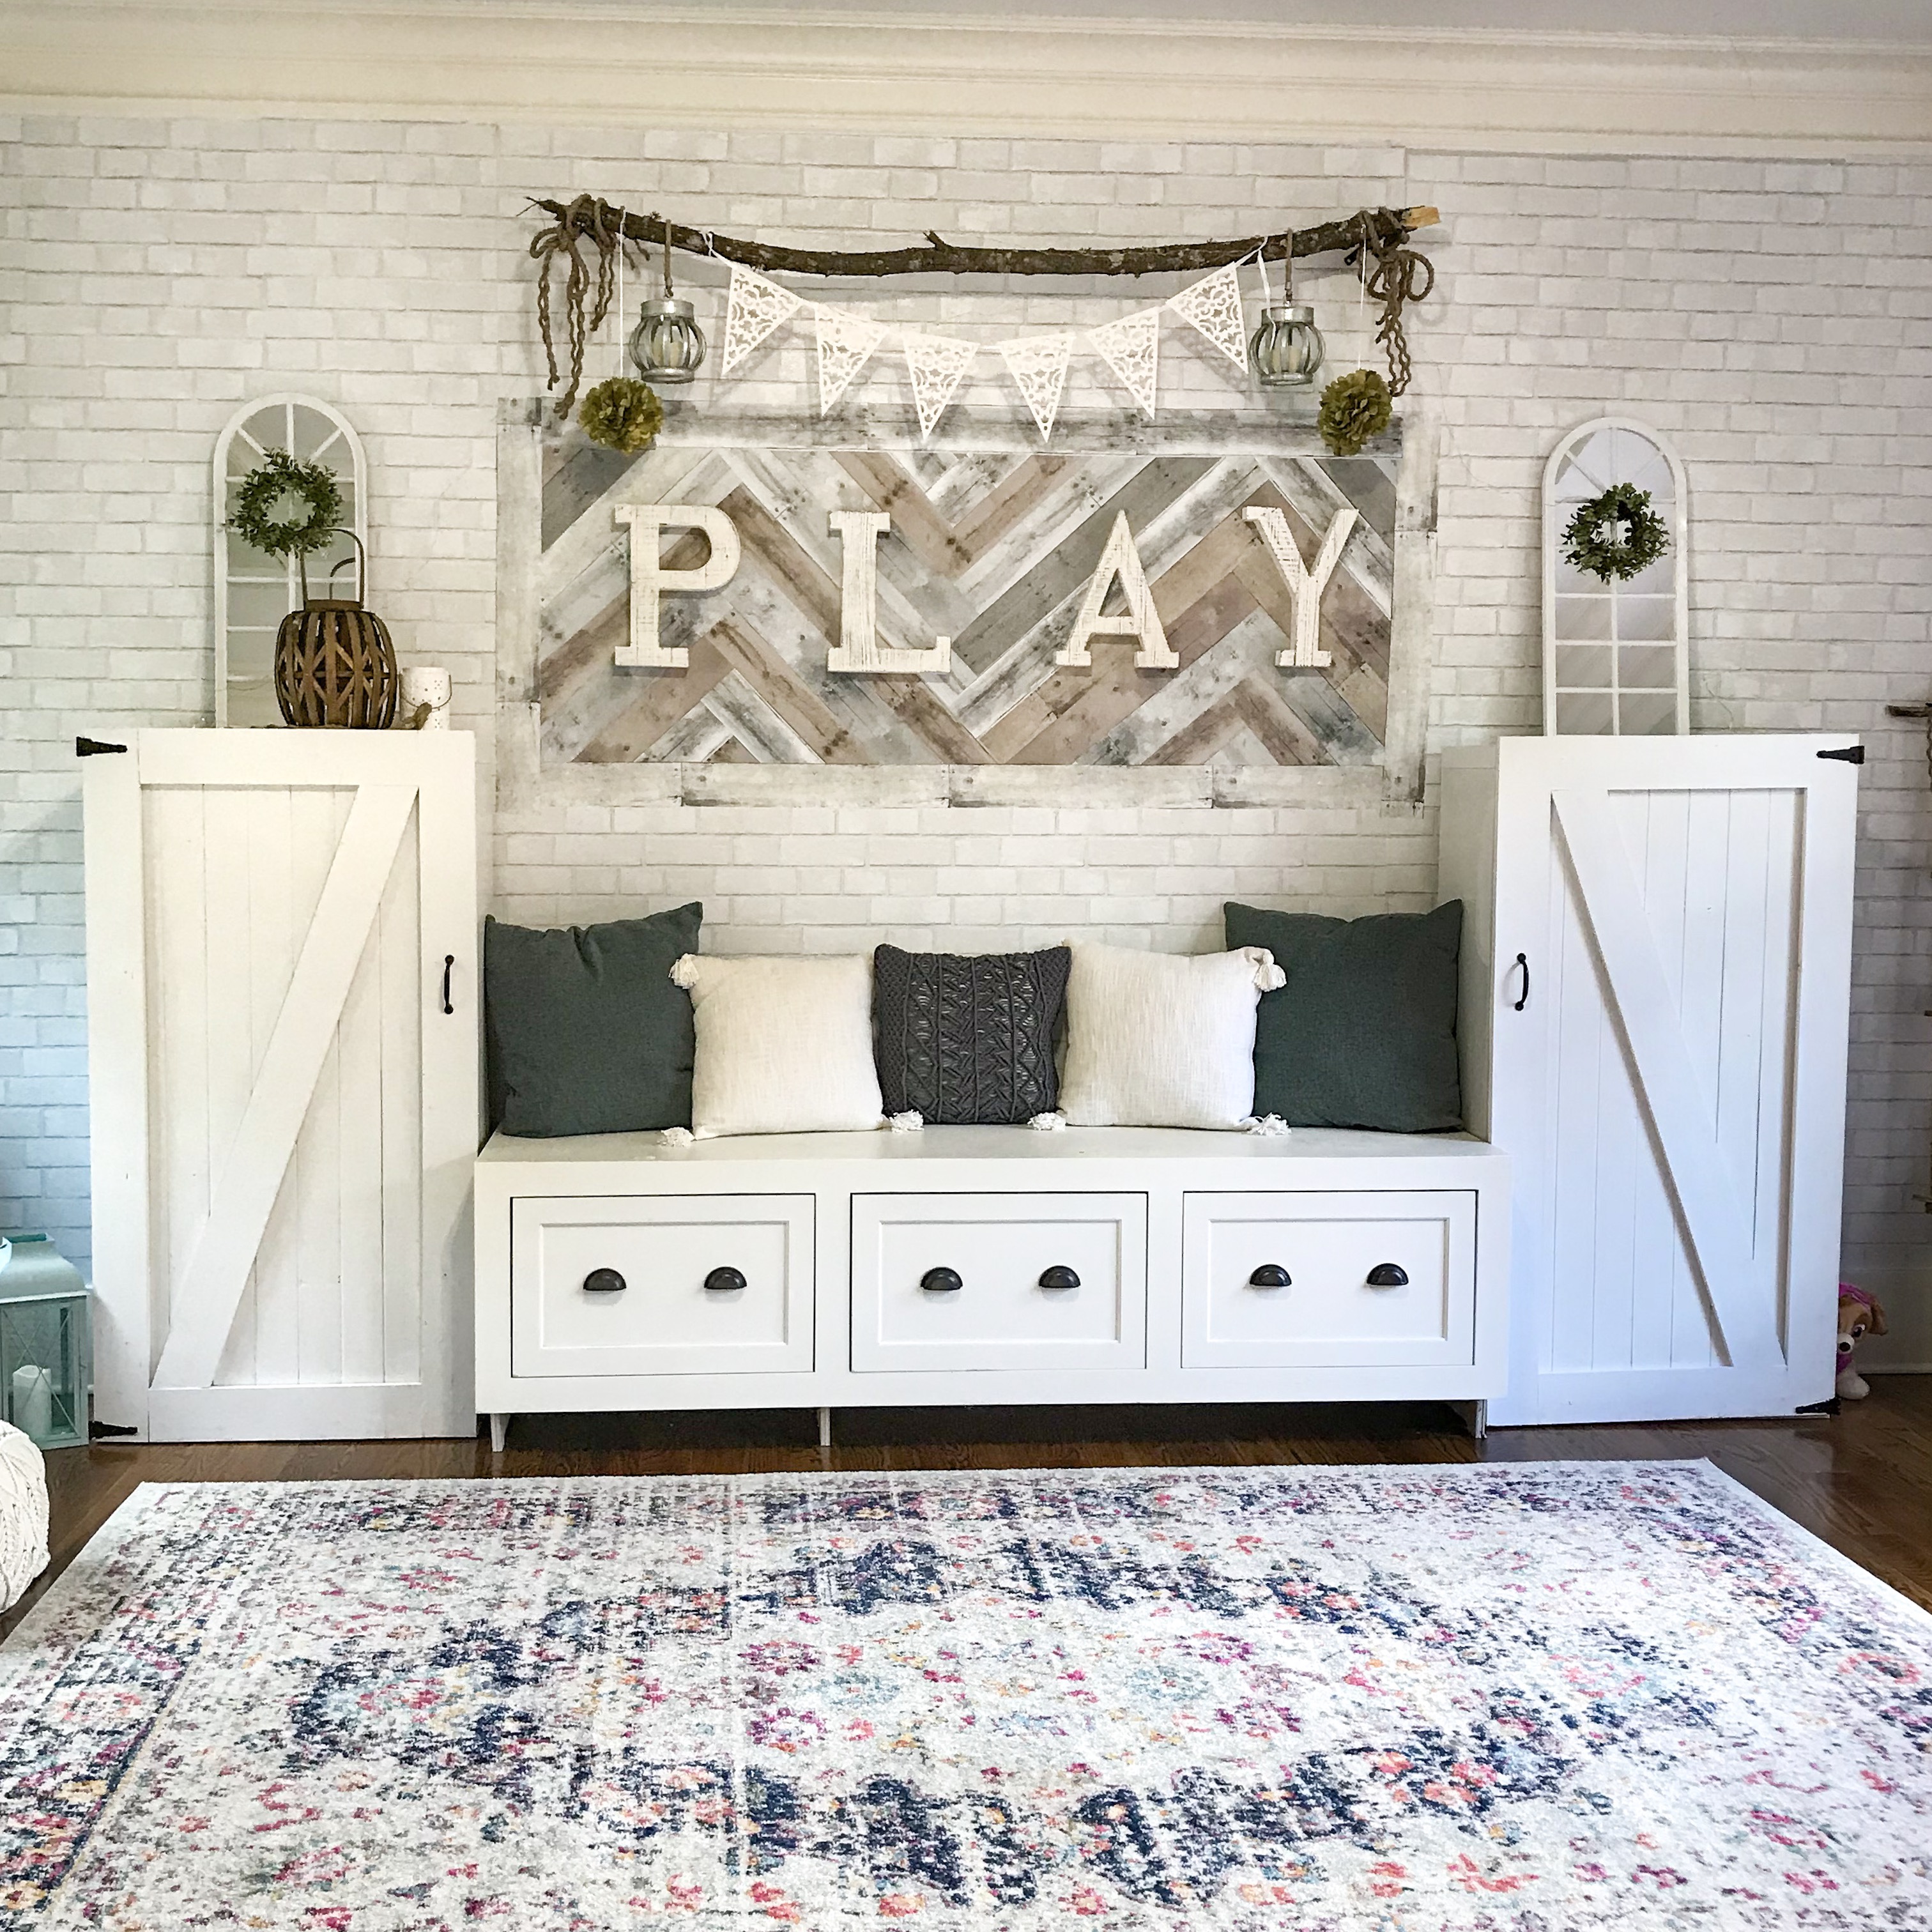
The cubbie shelf units I bought are from Walmart. Other brands may measure differently so you may need to adjust some measurement, but doors could be built for any unit.
Supplies
- Cubby/ Shelving Unit (follow link to purchase)
- 1 x 5 Common Board
- Wood glue
- Kreg Jig system– plus designated screws
- Wood filler
- Sand paper
- Paint (I used Linen Chalk Paint)
- Hinges (4)
- Door catch (4 one at top and bottom on each unit)
- Handles/ hardware (2)
The key for this specific unit was building light weight doors. This cubby is constructed from particle board which is no match for a heavy solid, wood door. I decided to use common boards from Home Depot. They aren’t very dense so they are light. For the other material I ended up finding cedar wall planks that were very light weight and had a tongue and groove effect so it fit together tight.
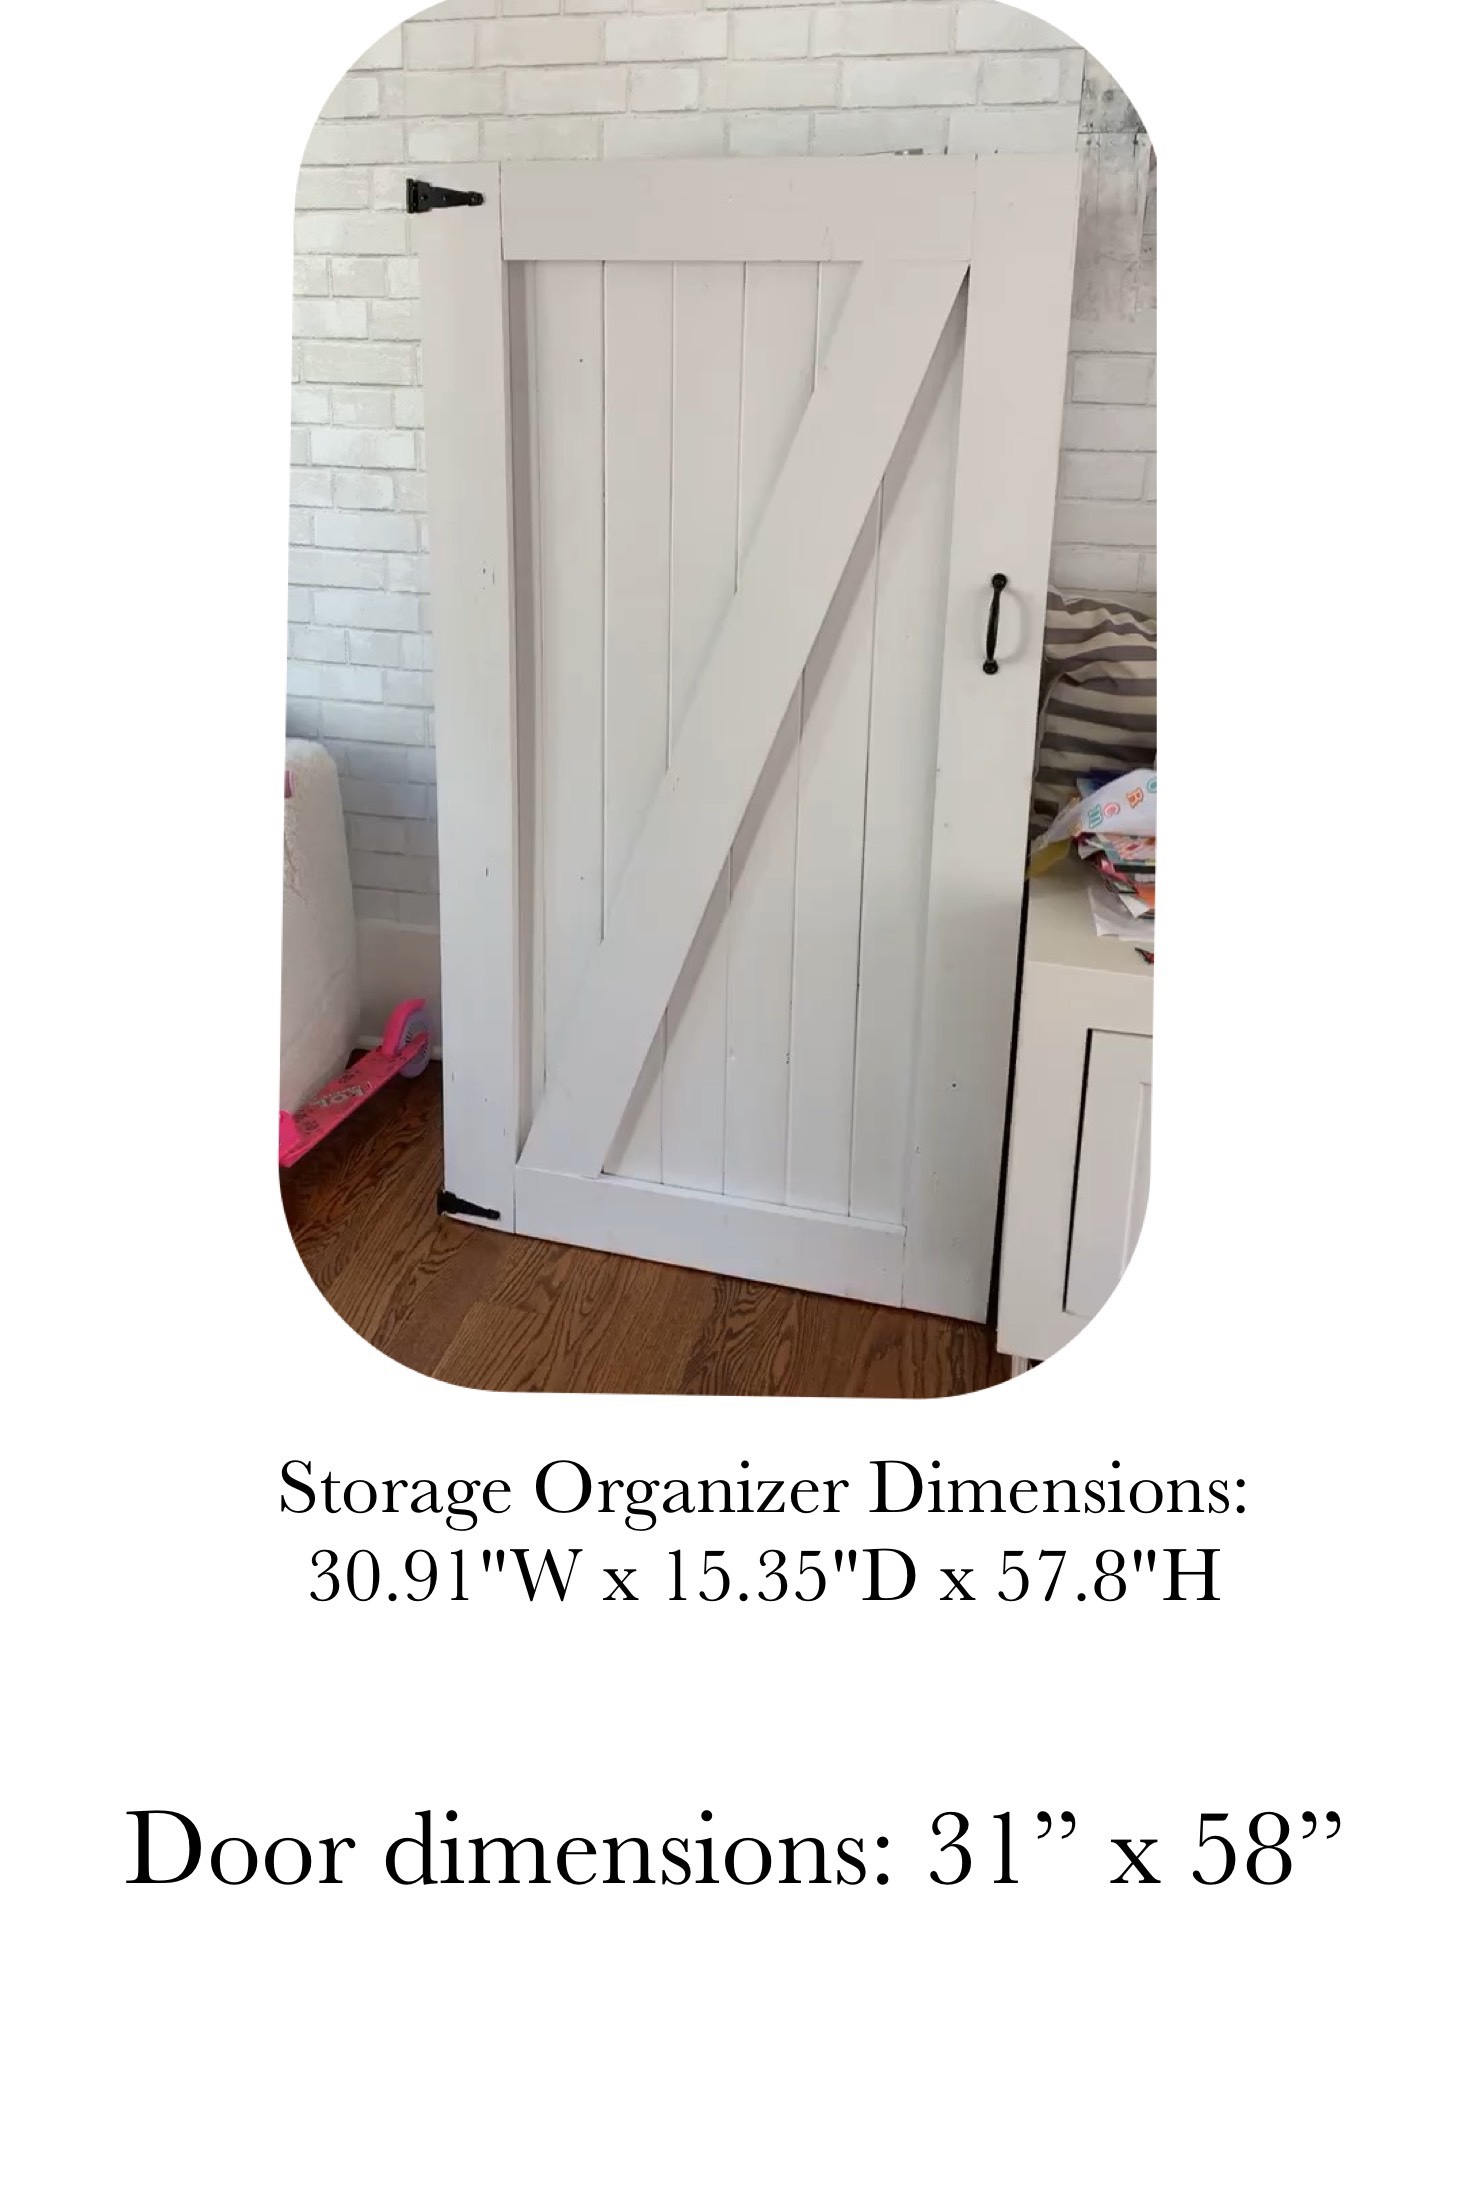
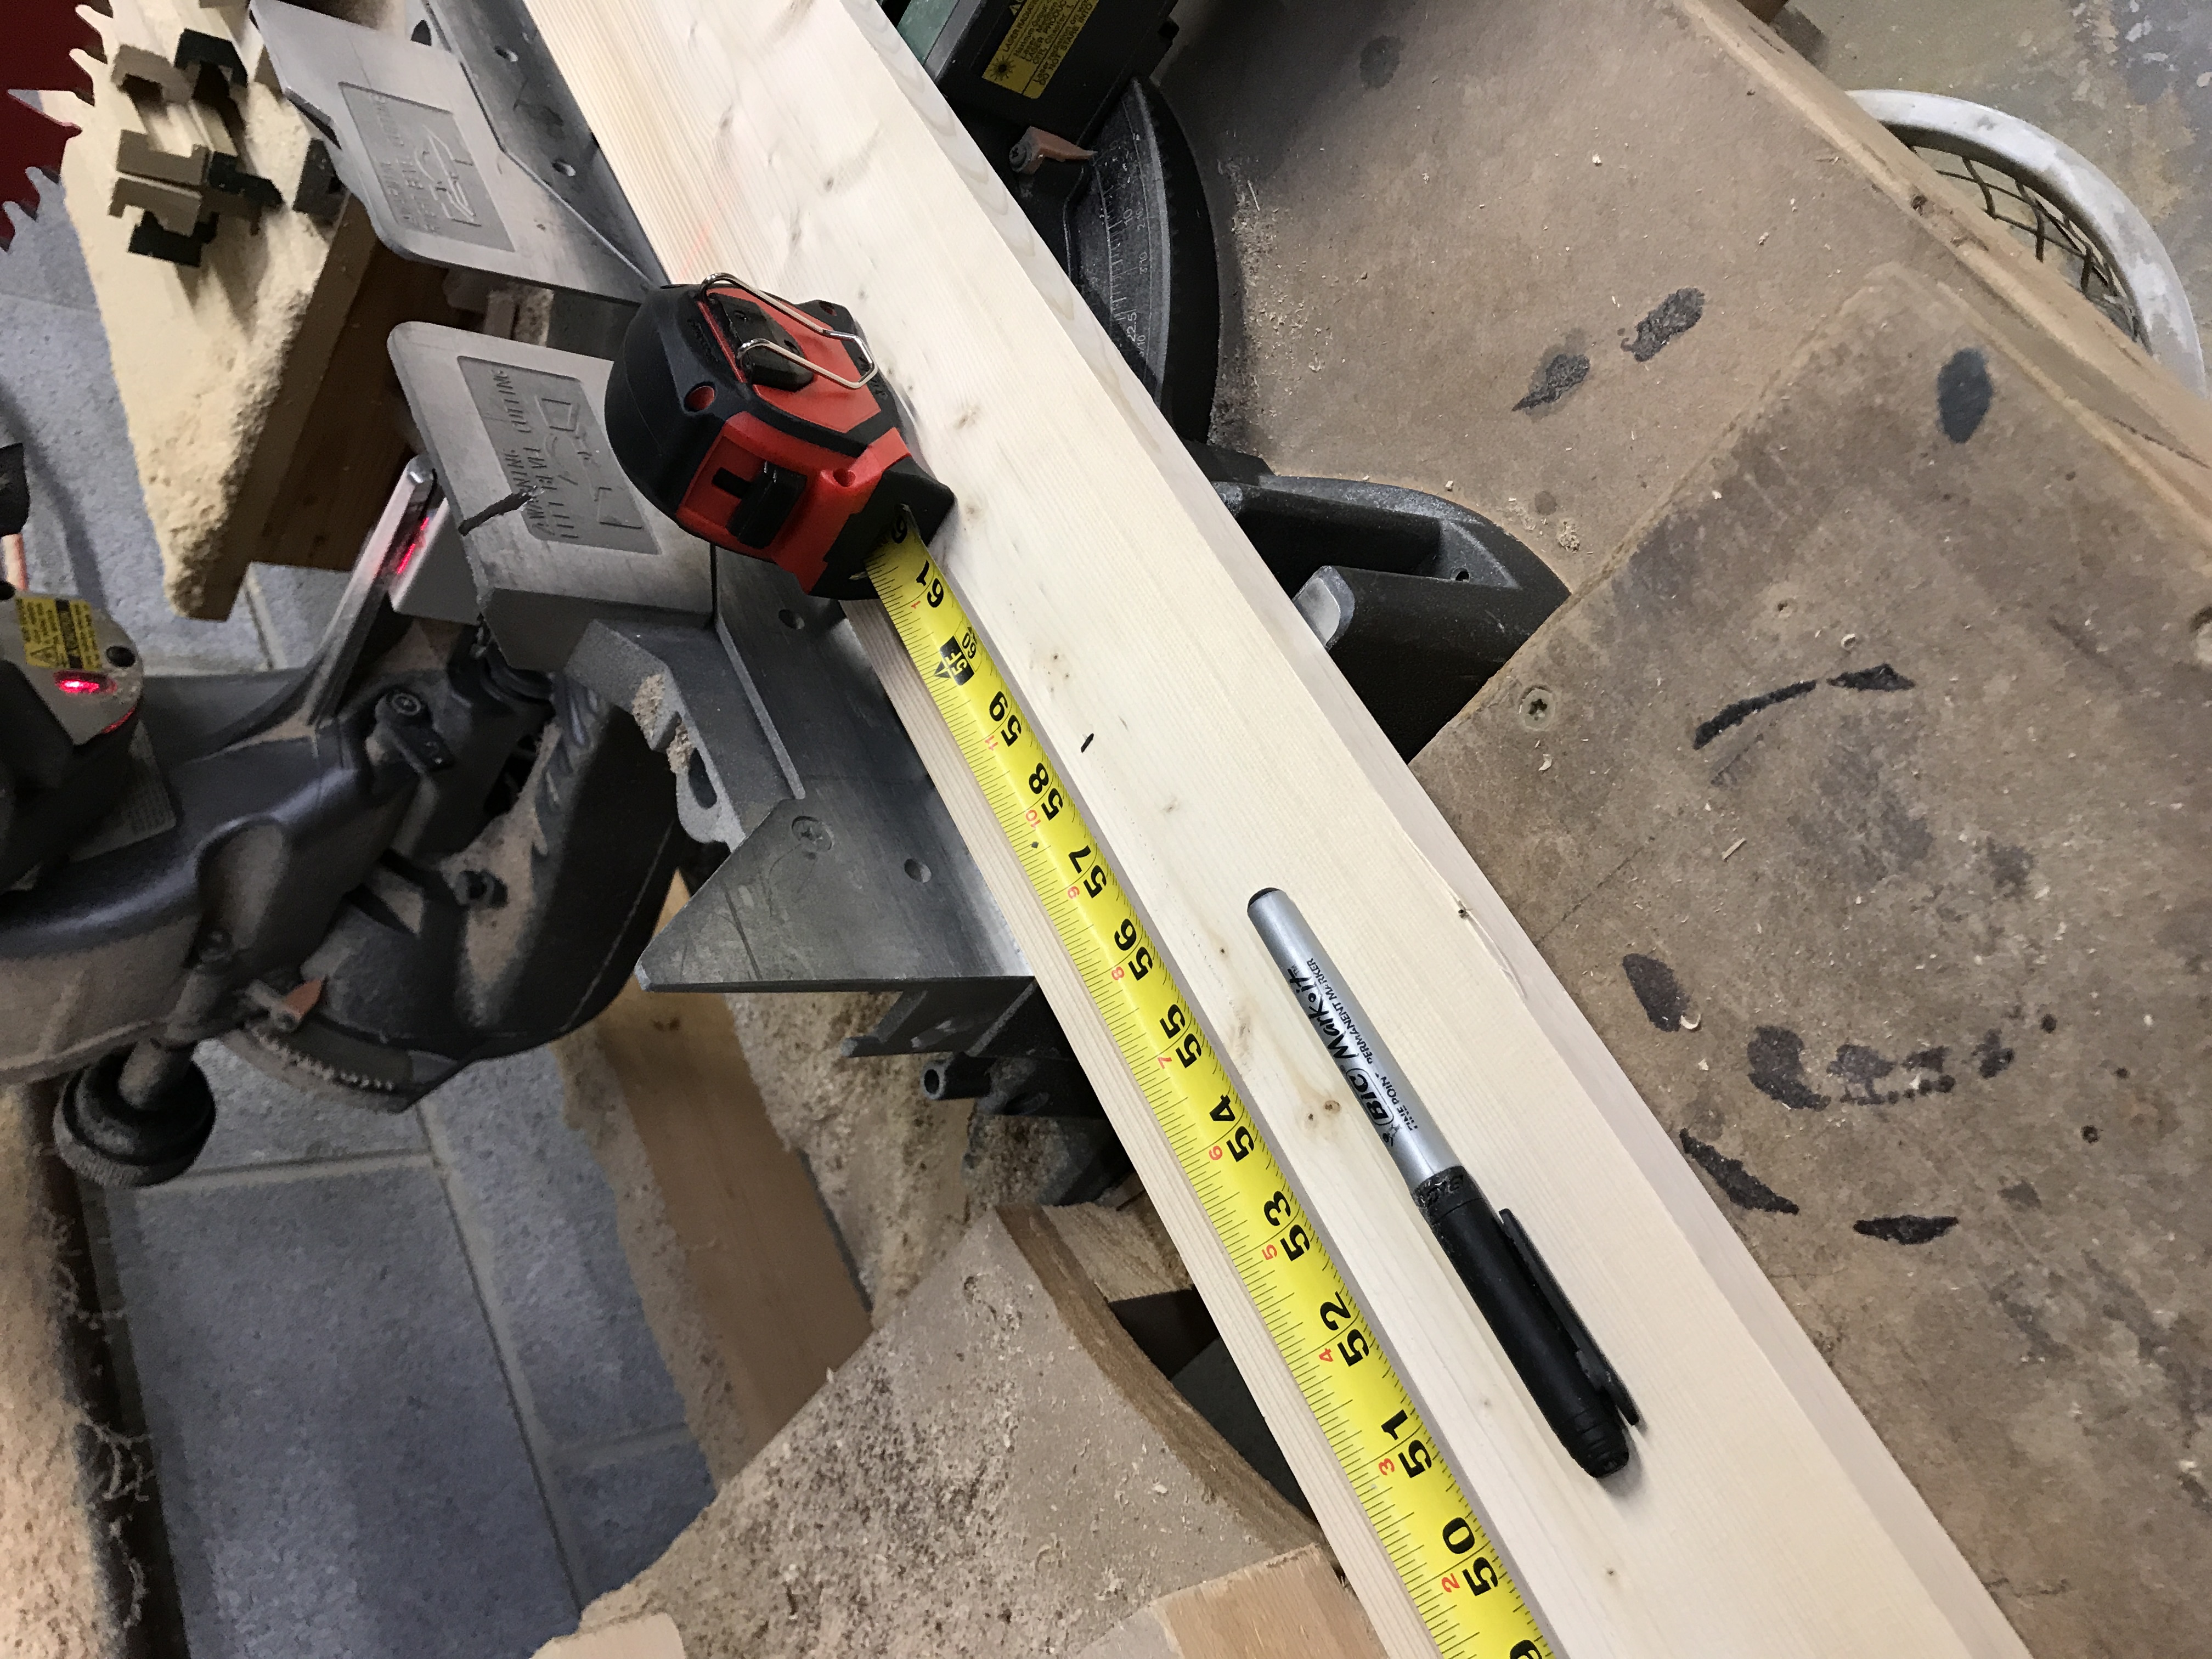
- Cut common boards to size (2 pieces at 58″ )
- Use Kreg Jig to drill two holes into either side of the shorter pieces. These shorter pieces should be cut to total width (31″) minus measurement of two outside longer pieces.

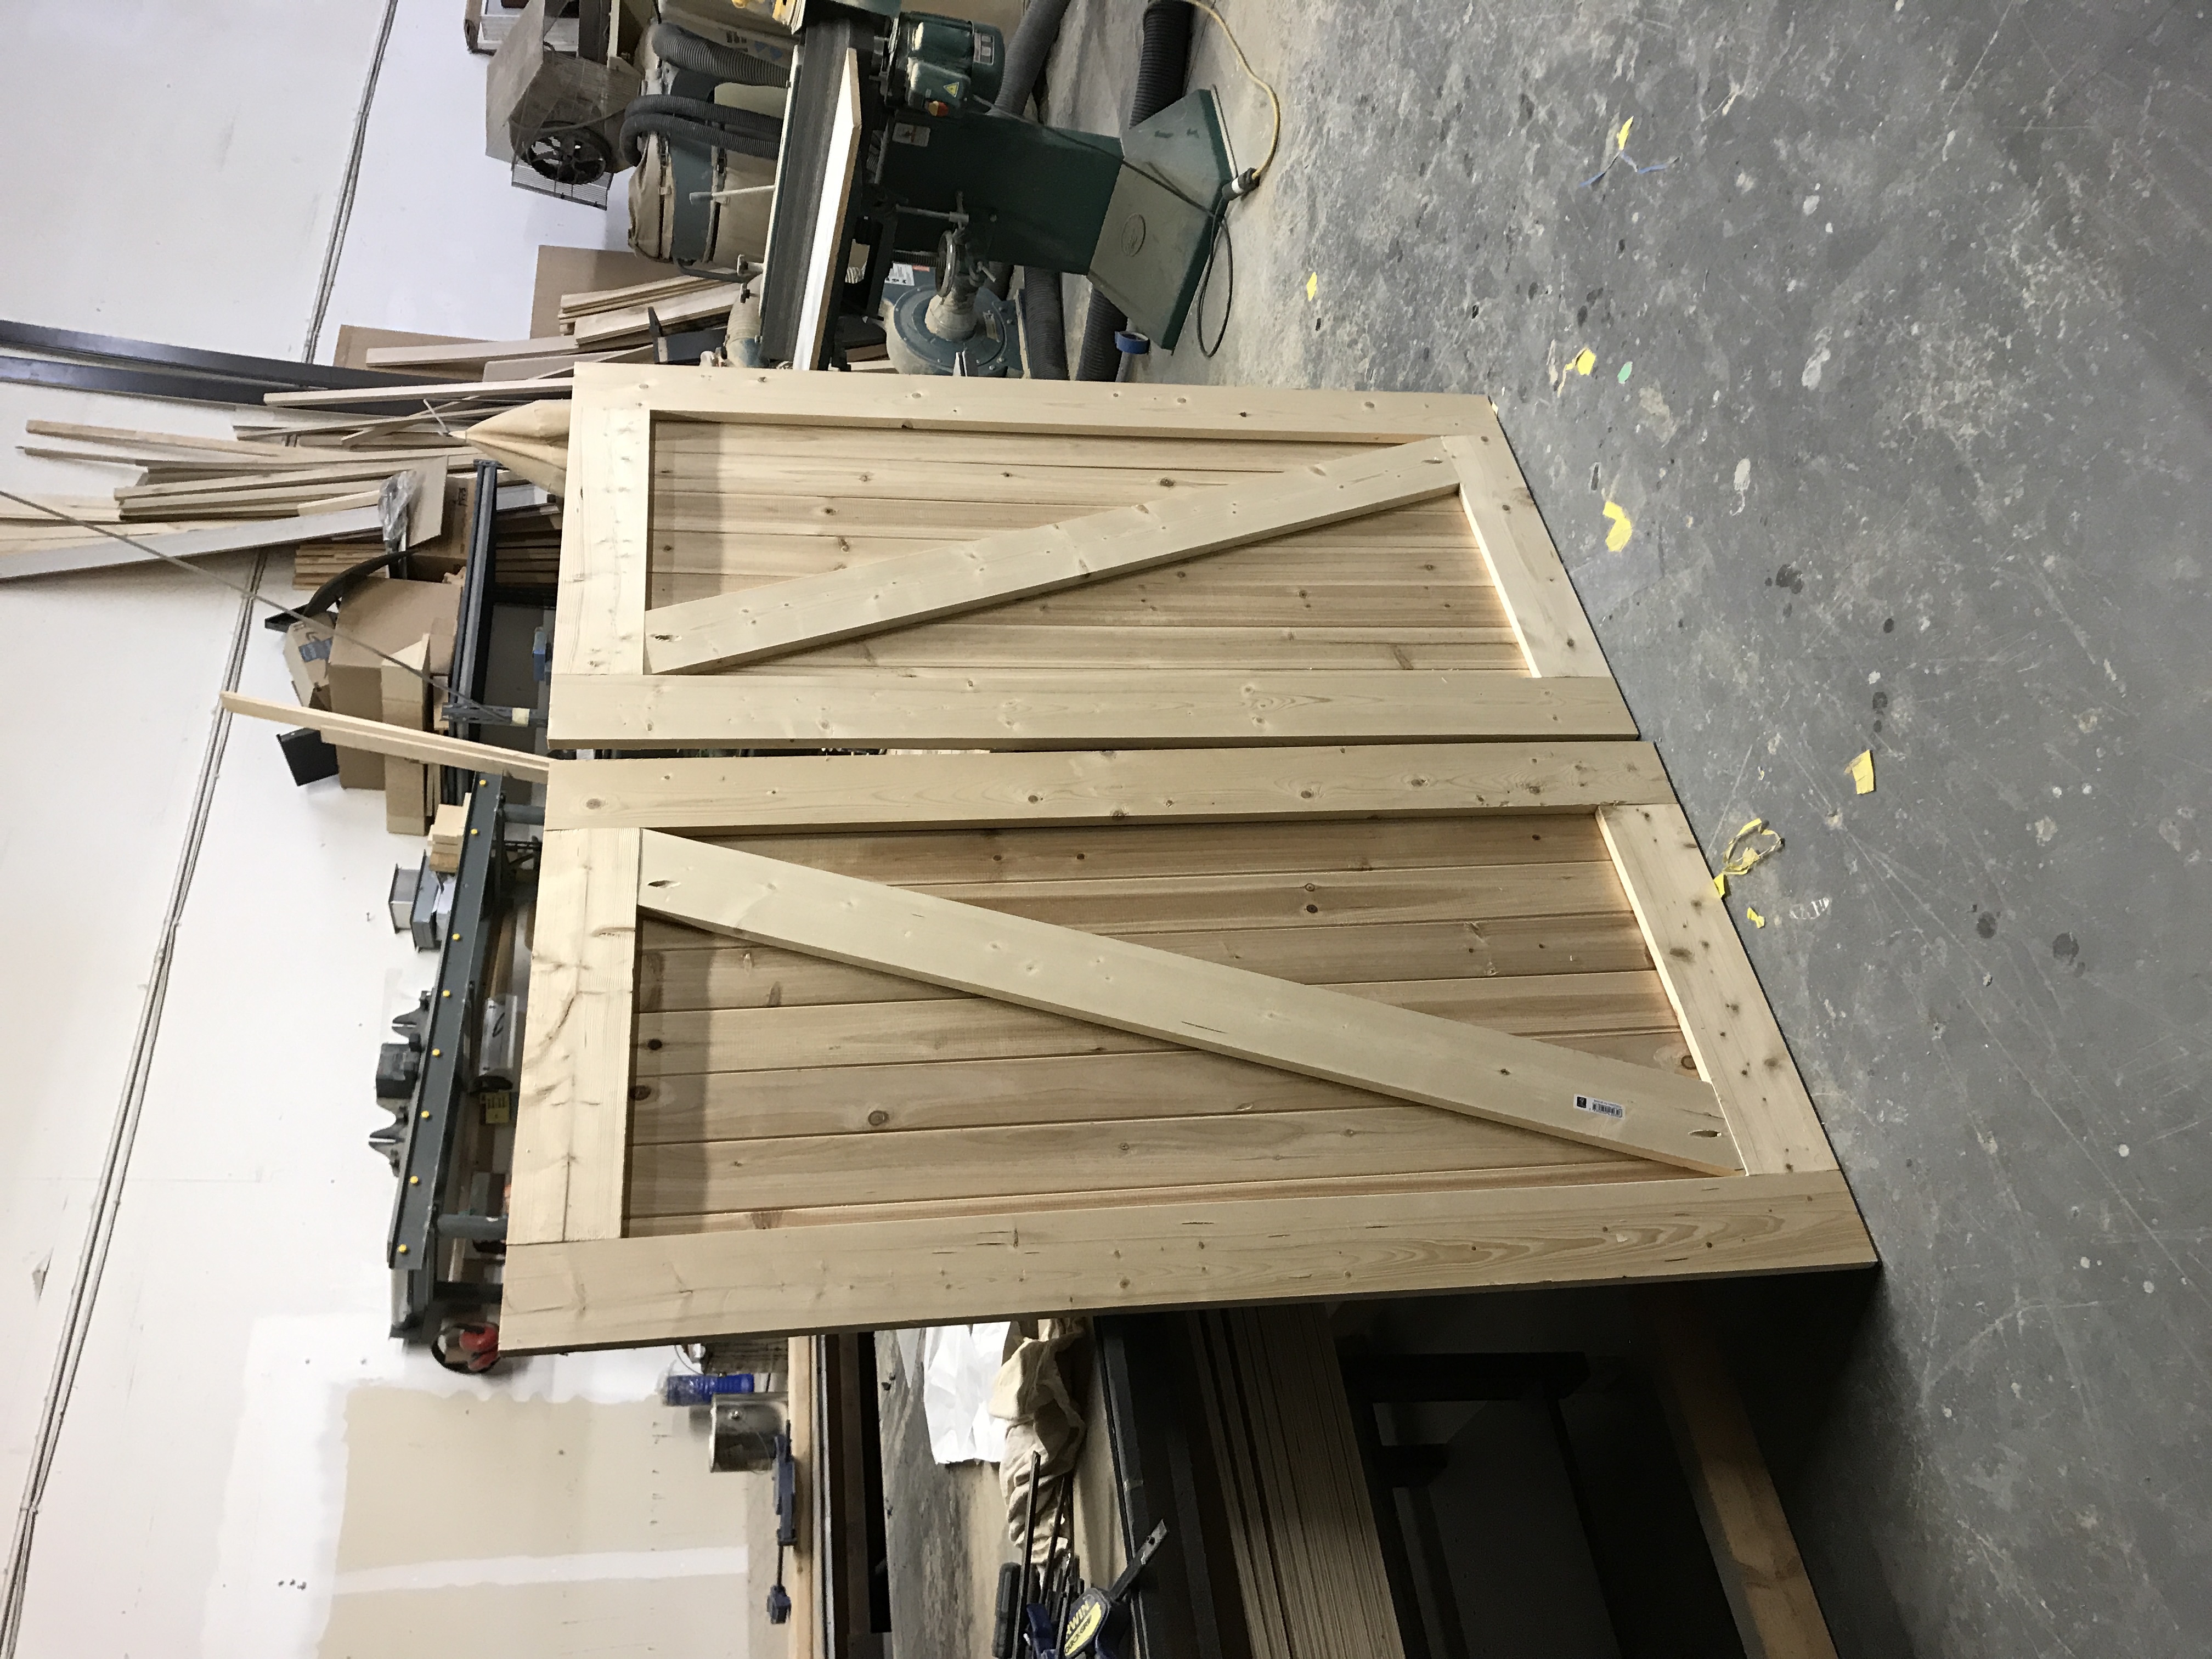
- Align the short and long pieces together to form first corner.
- Spread a light layer of wood glue
- Use the Kreg Jig clamp to hold it in place while drilling the screws in

- Wipe off any excess glue
- After entire rectangle frame has been assembled take one more common board and lay diagonally across and mark where to cut

- Use Kreg Jig to drill two holes into either side of the diagonal pieces and then attach to door frame with glue and Kreg Jig screws.
- Allow some time for the glue to dry prior to sanding (good time to make all the cuts for your 58″ cedar planks)
- Sand all joints flush
- After door frame is assembled align 58″ cedar planks along the back of door being sure to have the grooves meeting tightly with each plank (I don’t have a picture of this step)
- Staple the planks in place at top and bottom and anywhere they meet the frame around the door
- Fill holes, sand it again and time for paint
****One final extremely important thing to keep in mind when adding anything to a piece of furniture is ensuring it won’t shift the weight and make it hazardous when in use. It’s imperative to attach the cubby unit to the wall with screws/ anchors as the door changes the unit.
I built these doors two years ago so I hope this is explanation enough to get you started! Happy building!
